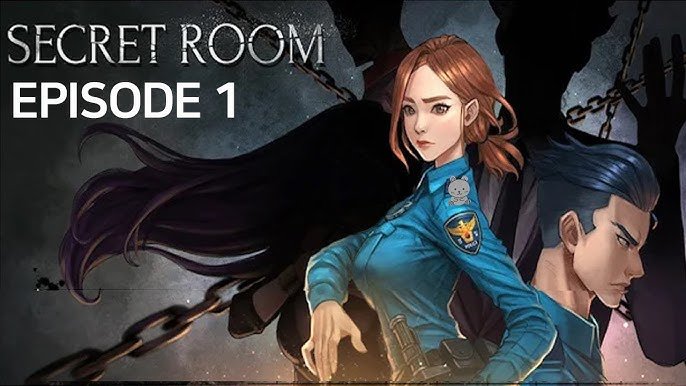
In this walkthrough, I explain how I escape the mysterious house in SecretRoom: Room Escape. Waking up locked inside with no memories, my only goal was to find a way out using my detective skills. Here is how I solved every puzzle and unlocked the secrets to both endings.
About Energy
Interacting with items and getting hints costs Energy. This resource recharges automatically every six hours. To get more, watching ads or completing challenges in the “Challenges” tab worked best for me. Buying it with real money is also an option.
The Episodes
The game features three locked chapters:
- Episode 1 – Judging House
- Episode 2 – Memory of the Day
- Episode 3 – Secret Room Lecture
Completing one unlocks the next. My journey started with Episode 1.
Episode 1: Judging House
The story begins with a woman calling the police for help. While most cops ignore it, a female officer decides to investigate. My task was to help her get the woman out.
Unlocking the Front Door
- Starting outside the house, my first step was grabbing a Tree Branch from the right plant pot.
- Right above it, a Nipper was waiting inside the mailbox.
- Next, a Garden Trowel was found hidden in the left plant pot.
- Using the Tree Branch allowed me to reach a Note stuck above the front door. Inspecting it with my magnifying glass revealed a hidden spot.
- With the Garden Trowel, digging up a loose tile on the ground uncovered a Wooden Crate.
- Back in my inventory, cutting the crate’s strings with the Nipper and rotating the box gave me the front door key.
- Unlocking the door let me step inside.
Entering the House
- Inside the hallway, tapping the mirror on the left wall revealed a cabinet key.
- A Box Cutter was sitting in the pen holder on the right table.
- Using the key opened the cabinet, where the Box Cutter worked perfectly to open the boxes inside and reveal a Spider Crate.
- Examining the Spider Crate and counting the spider legs on its sides revealed the door passcode.
- Entering the code 7546 successfully unlocked the next room.
Living Room 1
- Lifting the cushion on the right sofa uncovered a Handle.
- Searching the cabinet under the TV revealed an AA Battery and a Cross-shaped Iron Rod inside the second drawer.
- Combining the handle and the iron rod in my inventory created a screwdriver.
Living Room 2 & 3
- Tapping the right arrow led me into the next room.
- Underneath the rug, a CD-ROM Button was hidden.
- The bookshelf on the left held another AA Battery between the books, alongside a CD Case.
- Heading into the fourth room required tapping the right arrow once more.
- Using the screwdriver unlocked the wall vault next to the door.
- After grabbing the Music Box from the table, it was time to head back to the TV lounge.
TV Lounge
- Turning the Music Box upside down and inserting the batteries rewarded me with a Button.
- Opening the CD Case in my inventory let me retrieve the CD.
- Back at the TV, inserting the CD into the DVD player and hitting play started a video.
- The TV screen flashed colors in this order: Red, Blue, White, Blue, Red, Blue, Blue, Red.
- Pressing the vault buttons in that exact sequence opened it, allowing me to take the key inside.
- This key unlocked the Spider Case in my inventory to reveal a Fuse.
- Putting the Fuse in the circuit box next to the door of the third room triggered a mini-game.
- Solving the pipe-connection puzzle restored the power. Flipping both switches revealed a shadow on the wall, and the kitchen door opened to show a tied-up woman.
Kitchen
- Opening the cabinet left of the stove revealed a Saucepan.
- A Battery was tucked inside the oven furnace, and a Pipe was in the top cabinet.
- Checking the freezer got me some Ice Cubes, while the cabinet below the oven held a Gas Valve.
- Using the pipe repaired the leak above the toaster, and attaching the Gas Valve secured it.
- After placing the Saucepan on the stove, adding the Ice Cubes and turning on the gas melted the ice.
- Tongs helped me grab a key from the hot water. The door suddenly slammed shut.
- Tapping the down arrow changed my perspective.
- Using the key unlocked the cabinet on the right to reveal a Torch Part and a Light Bulb.
- Inspecting the Torch Part came next, followed by clicking the chair to find a Switch.
- Changing my perspective again let me retrieve the pipe I had fixed. Inspecting it revealed the code 386.
- The calendar near the door showed a Triangle value of 617.
- Counting the brown and gray pieces on the chair gave a Square value of 825.
- These numbers went into the microwave console:
- Circle: 386
- Triangle: 617
- Square: 825
- The microwave popped open, yielding Butane Gas.
- Combining the Torch Part, Butane Gas, and Switch built a working blowtorch.
- Melting the chains freed the woman.
- Placing the Light Bulb in the holder above the table revealed the exit code: 9277.
- Putting the battery into the digital lock and typing 9277 opened the door.
- Escaping the kitchen added the Corridor Key to my inventory.
The Corridor & Reading Room
- Entering the corridor required using the key on the door in the second room.
- On the right was the Reading Room.
- Checking the table revealed a Tile (2) on a newspaper. I also noted the date.
- The second drawer held a Hammer and a Coin, while the bookshelf contained a Safe.
- Taking Book (Vol. 2) from the right shelf completed the room search.
- Back in the corridor, inspecting the safe and turning it around revealed coordinates: 617 and 224.
- Aligning the dial to 3, 6, and 4 opened it, giving me the Spinning Device.
- Using the coin unscrewed the panel on the next door, revealing a USB Drive.
Solving the Spinning Puzzle
- Plugging the USB into the first room’s computer let me watch the spinner footage for clues.
- Adjusting the symbols on my Spinning Device to match the video unlocked it.
- A key popped out of the device.
- Using this key unlocked the bookshelf on the right, which held the Bathroom Key.”
Bathroom
- Unlocking the bathroom door let me step inside.
- The trash can held Tile 4.
- Opening the cabinet above the toilet revealed Tile 5.
- Tile 0 was hidden under the sink.
- In the bathtub, a Faucet sat on the left, and Tile 8 was on the right.
- Smashing the mirror above the sink with the hammer revealed Tile 3 and the Desk Drawer Key.
- Placing all the tiles on the front wall was the next step.
- Using the newspaper date, entering 40251384 unlocked the vault to reveal a Gear.
Back to the Corridor
- Placing the gear into the corridor mechanism box got things moving.
- Back in the first room, the locked drawer opened with my key to yield a second, smaller Gear.
- Placing the small gear in the mechanism box unlocked the Bedroom door.
Bedroom
- Entering the bedroom was finally possible.
- Lifting the pillow revealed a Cellphone.
- Checking the notebook in the right drawer and the wall poster helped decipher the phone’s password.
- Typing 0690 unlocked the screen.
- The phone displayed the code 8563, which is needed for the corridor trapdoor.
Trapdoor & Storage
- Heading to the trapdoor in the corridor, entering 8563 opened the way to the basement.
- The trunk on the left contained a Magnet, while a rack on the wall held Lubricant.
- Spraying the rusty valve with lubricant and turning it got the water flowing. I also grabbed the Saw near the drums.
- Over at the sewer grate, combining the Rope and the Magnet let me retrieve a Power Button from the water.
- Looking at the bottom-left corner of the grate revealed the code 4712.
- Entering 4712 into the right closet gave me a Crowbar and Pipe Parts.
- Fixing the leaking pipe with the Pipe Parts stopped the water.
- Inserting the Power Button into the left circuit box and tapping the buttons until the screen turned red triggered a loud gunshot upstairs.
- Running back to the corridor was my next move.
Investigating the Shot
- Back in the corridor, a Revolver was lying on the floor.
- In the bathroom, attaching the Faucet to the sink and turning on the hot water filled the room with steam, showing the code 1294 on the mirror.
- Heading to the bedroom, Book (Vol. 7) was waiting on the bookshelf.
Third Room on the Left
- Entering the code 1294 unlocked the third room on the left.
- Going through this room led back to the starting area. The crowbar helped me pry open a hidden safe in the floor.
- In the left cabinet, placing the red and yellow books and arranging them to match the painting where the officer sat was key.
- This sequence revealed the code 0629.
- Resetting the books again unlocked the lower compartment to yield the White Safe.
- Entering the code 4003 (found from computer images) opened the White Safe to reveal Medal N.
- Back in the PC room, unplugging the USB showed the code 5817 printed on it.
- Typing 5817 opened the Red Safe to reveal Medal S.
- Back in the corridor, removing the wall painting revealed a wooden frame. Cutting the wood with the saw yielded a Ring and a note.
Getting the Final Medals
- In the kitchen, using the hexagonal ring opened the oven, giving me the Green Safe.
- Flipped over in Living Room 1, the CD from the TV revealed the code 8897.
- Opening the Green Safe with code 8897 gave me Medal I.
- Placing all three medals in the TV lounge vault unlocked a second CD.
- Playing this CD on the TV showed flashing numbers on the screen.
- Over in Living Room 3, a dynamite bomb was wired to the exit door. Entering 6890 gave me a Necklace.
Ending 1: Betrayal
- Walking back to the bedroom, using the revolver to shoot my partner yielded the second Necklace.
- Returning to Living Room 3, placing both necklaces on the bomb tray defused it.
- Stepping through the exit door and inspecting the clue on the right wall completed Chapter 1.
Ending 2: Escape Together
- Bypassing the bedroom shootout, heading straight to the bomb in Living Room 3 was the alternative path.
- Placing the single necklace on the tray and tapping the red area until it turned blue defused the bomb.
- Going through the door and reading the note on the right wall revealed the code 75035#.
- Back in Living Room 1, dialing 75035# on the telephone and calling gave me the Entrance Wall Key.
- Heading back to the entrance, using the key on the right wall highlighted shape clues.
- Searching the rooms (Living Room 1, Study, Bedroom, Kitchen) matched the shapes with arrow directions.
- Setting the wall arrows to Up, Left, Right, Left, Down, Up opened the hidden box.
- Taking the key inside and using it on the main gates allowed a clean escape.