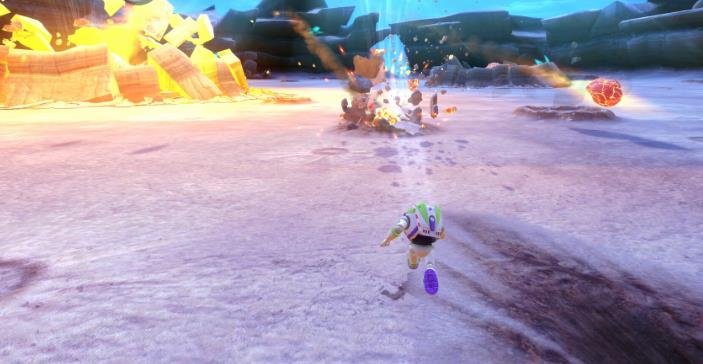
In this guide, I explain how to find all the collectibles in Disney/Pixar Toy Story 3 Complete Edition, including Collector Cards, Special Cards, Townspeople, Andy’s Memorabilia, Zurg Parts, and Alien Figures.
Collectible Abbreviations
I use the following abbreviations throughout this guide to make each collectible easier to identify:
- CC: Collector Card
- SP: Special Card
- TP: Townsperson
- AM: Andy’s Memorabilia
- ZP: Zurg Parts
- AL: Alien Figures
Level 1 – Train Rescue / Loco Motives
- CC – After the very first jump, I head left and go up and over the ramp. I follow it all the way to the right to collect the card before dropping back down.
- CC – After collecting the first card, I fall directly onto this one in the middle of the track.
- CC – As I move down the canyon, I look to the right as the rock ledge starts breaking. The card is there.
- CC – After Ham announces the end of the canyon, I jump over the first fence inside the cave. I head left and follow the mine cart rails, jumping along the way until I reach the end.
- CC – Once I reach the train and save the first orphan, I collect the card directly ahead.
- CC – After saving the second orphan, where I lift the cage by shooting the target, I collect the card directly ahead.
- TP – After collecting the previous card, I break the long grey crate ahead on the left to find the Woody figure.
- CC – After rescuing the third orphan, I smash the door with Y. The card is directly ahead.
- SP – When I reach the section with four cows, I lower the catapult using a ball, pick up a cow, and place it on the catapult to send it flying. I lower the catapult again and jump onto it myself. The card is directly ahead, inside the hole made by the cow.
- CC – I look ahead to the left and collect the next card in front of the crate.
- AM – After rescuing the final orphan, I collect the item that appears directly ahead.
Level 2 – Andy’s House / Hold the Phone
- TP – As soon as I start the level, I run straight ahead and go under the bed to find the Jessie figure.
- CC – As I come out from under the bed, I look for an orange trash can with a teepee on top. I jump inside to collect the card.
- CC – I move to the right and find a red box. I push it out of the way to collect the card inside.
- CC – I jump onto the red box and head left toward the computer desk. I cross the desk and jump onto the stack of boxes against the wall. When I reach the box with a ? on it, I jump and press Y to land on it and collect the card.
- CC – I wall-jump back up and continue around toward the bed. I cross the bed and look for another box marked with a ?. I jump and press Y to collect the next card.
- CC – I leave Woody there and switch to Buzz by pressing LB. I retrace Woody’s route and pick him up with X. I toss him onto the top of the white dresser using RT. Ham appears along with the card. I switch back to Woody and drop down.
- SC – After picking up the cell phone, I enter the basement and head straight toward the stairs. At the bottom, I smash through the vent using Y and collect the card.
- AM – I head all the way to the top of the stairs and jump onto the box to collect the next item.
- CC – I jump onto the stair railing and slide down to the ironing board. The card is directly ahead.
- CC – I grip and jump up the red boxes along the wall beside the stairs. Once I reach the top, I collect the card in the corner of the room, on top of the fridge.
- CC – I jump over to the shelf on the left and use the red handle to slide open the door and collect the card.
- CC – I perform a big double jump down to the tool bench and knock down some boxes. I head to the ground floor and push the red box toward the washing machine. I use it to jump onto the Army guy, pick him up, and look for the pumpkin basket. The card is right beside it. I toss the Army guy toward the card, holding up the direction for the full distance to reach it.
- CC – I switch to Jessie and climb the boxes to reach the tool bench. I zigzag up the darts by pressing A and then X in the air, using the move from Sly Cooper. I cross the small shelf and red brackets to reach another Army guy. The card is behind the cleaner bottles.
Card Set 1 complete!
Level 3 – Buzz Video Game / To Infinity and Beyond
- CC – While flying through the asteroids, I reach an open area filled with them. I blast them all and collect the card directly ahead.
- CC – While flying, I reach a section where I need to dodge walls by pressing a direction and A. A little further ahead, I enter another relatively open area filled with asteroids. I blast them all and collect the card directly ahead.
- CC – I reach another wall-dodging section, which is a little trickier this time. The card is in the middle, directly after one of the walls.
- SC – After landing on the planet and passing the meteors that smash into the ground, I reach an area with floating platforms. I make my way through until I reach the round floating mines. As I continue, I spot the card in the distance. Once I get as close as possible, I look right and hold A to heat and explode the crystal. I quickly jump onto the passing platform and leap to the card.
- CC – After slamming the two pieces of rock into the ground to increase the air pressure, I reach more floating platforms with round floating mines. I make my way around and collect the card in the middle.
- CC – After collecting the previous card, I look ahead near the right edge of the area. The next card is directly in front of me. It can be difficult to see through the mist, but it is there.
- TP – After entering Zurg’s base, passing the spikes, and dropping through the vent into the electrified green area, I reach a large spinning drill. I move right past it and look up to find the Buzz figure. I use a couple of wall jumps to reach it. I need to stay in the middle of the wall, not all the way toward the front or back.
- CC – After climbing to the top of the drill, I collect the card on the left.
- CC – After recreating the opening scene from Toy Story 2, I reach an area with a red Z-shaped floor, wall-mounted turrets, and robots. I clear the room and shoot the two crystals beneath the floor, one on each side. Once the barrier drops, I jump into the hole and collect the card in the corner of the Z-shaped room. It is opposite the exit with the three coin capsules and vent.
- CC – I collect the card on top of the second drill that I need to climb.
Level 4 – Sunnyside Daycare / Fair Play
- CC – At the start of the level, I switch to Jessie, turn left, and look for a coin capsule. I jump onto the ledge and continue along the tops of the shelves until I reach what looks like storage bins stacked upside down on the blue cabinets. The card is right behind them.
- SC – I climb onto the storage bins and jump to the nearby overhead light. I double-jump to the next light on the right and then reach the butterflies in the middle. Alternatively, I can double-jump and press X to reach the butterflies. I cross them to the other row of lights and look for the card near the ceiling, beside two more butterflies. I zigzag up, jump to the card, and press X to land back on the butterfly.
- CC – From the butterfly, I jump back to the closest light and look slightly left to find two more butterflies. I jump across to the front light near the green house where I started the level. I make the final jump to the green roof and collect the card.
- TP – I switch to Woody and jump out the same way I did with Jessie, but stop at the first ledge with the animal tank containing a red snake. I switch to Buzz and pick up Woody. I move to the edge farthest from the green house and toss Woody onto the green roof. I can also use this method to reach the previous card if it is easier. Before Woody slides off, I switch back to him and head toward the wall with balloons. Straight ahead, I find three golden hooks. I swing across them to collect the Daycare figure.
- ZP – Once I am on the floor, I turn 180 degrees and head back toward the green house. I stand at the bottom of the ramp and look up. On the right-hand side, I find a brown stool with the Zurg head on top.
- ZP – I return to the bottom of the ramp, turn away from it, and look for the back of a large tropical-patterned chair. I move the camera left to spot a purple octopus. The Zurg body is on the same shelf, in the opposite corner.
- ZP – I jump off the shelf and look left to find some children’s artwork on an easel just past the large chair. I head over to it, move around the side, and enter the middle of the easel to collect the gun.
- CC – I turn the camera until I see Ham and run toward him, passing him to find a coat rack. A sink is beside it. I wall-jump between the sink and the coat rack to reach Rex on the shelf above. Facing Rex, I turn 180 degrees and use X on the hook to reach the top of the cabinets and collect the card. I then return to Rex.
- CC – I switch to Buzz and take him to Rex. I pick up Woody and throw him across the large gap to the shelf opposite the hook I just used. I switch back to Woody and collect the card from the purple shelf ahead, beside a box.
- ZP – I drop down onto the green desk below and look underneath it to find the cape.
- CC – I run back toward the green house where I started. Along the way, I find a small gap that I can use to wall-jump onto the cabinets where the storage bins were located near the first card. I take Woody up the bins and onto the first overhead light again. Straight ahead, I find two golden hooks. I swing across to the light at the end and look for the silver chain running from one of the light’s corners.I switch to Buzz and climb through the same gap I used with Woody. Instead of heading toward the bins, I go in the opposite direction, toward the green house, and stop on a blue bookcase. I look left and find another blue bookcase across the aisle. I double-jump onto it and carefully hop onto the low part of the chain in front of me. Buzz warps onto the chain, which takes him to the light where Woody is waiting. I pick up Woody and toss him into the open vent straight ahead. I switch back to Woody and collect the card.
- CC – I head to the green bug-like character, Twitch, near the ramp by the green house. I race on Bullseye and pop all 40 balloons to complete the event. The card appears beside Twitch when I finish.
- CC – I head to Sparks, the robot at the back of the room near the green desk, and talk to him to start the Teeny Racer Challenge. I race around in the car and smash all 10 piles of blocks to win. The card appears beside Sparks when I finish.
- CC – I head to Chunk, the rocky brown character near the large chair, and start Alley Throw. This is the toughest minigame so far. I need to stop all 100 aliens without missing to earn the card. I can hold RT for a pseudo-rapid-fire effect, which saves me from repeatedly mashing the button.
Level 5 – Bonnie’s House / Witch Way Out
- CC – I work my way around the start of the level. When I reach the pink lamp, I look up to find the card near the light bulb. I use X from the far edge of the platform to swing up and collect it.
- CC – I continue until I reach an area where I need to smash a pile of blocks, wall-jump, flatten a book, and smash the pile of blocks underneath. I collect the card there.
- CC – I continue along the only available path and climb the pile of books in the corner. I jump onto the small ledge above and shimmy to the end. I jump across and drop onto the book to collect the card.
- CC – I continue along the path until I reach the floating green soap. After jumping off the last soap bar, I dash into a bag to knock it down. I keep moving left and find three helicopters that I use to swing across. The card is at the end.
- CC – I head back the way I came and jump onto the brown shelf to collect the card directly ahead.
- CC – I continue until I need to shimmy along some crayons on the wall. I follow them around and smash through the pile of blocks. I jump onto the floating book and quickly jump to the other side before the book rises. I smash another pile of blocks and collect the card.
- SC – I continue until I reach the hamster cage. I do not leave this first hamster section yet. Instead, I jump onto the blue platform and double-jump straight up into the tunnel above. I wall-jump up the tunnel to collect the card.If I continue forward without collecting this card first, I will have to replay the level. Thanks to Crusty for remembering this easily missed collectible.
- CC – I continue through the hamster tunnel and across the floating books until I land on a pink bag. I look left and spot another card on a green bar of soap. I jump over and collect it.
- CC – I ride the first grind rail into the battery control room and insert the first battery. I ride the lift to the top and reach the purple ledge leading outside. Before leaving, I head all the way left along the purple ledge to collect the card.
- TP – At the top of the elevator, I ride the second grind rail and jump onto the first green loop on the right. I then jump to the green line on the left, which takes me into an asteroid. I follow the path down and left until I reach a dead end with a breakable floor. I ground-pound through it and land beside the Blue Dog figure.This also unlocks the Townspeople Hunter achievement.
Level 6 – Prison Break / Hide and Sneak
- AL – After hitting the switch to open the barrier for Jessie, I run past her to the back window and turn right. I collect the Alien Prisoner figure from the top of a box.
- CC – I push the red box, jump over the wall, and climb onto the nearest table. The card is on top of the next table directly ahead.
- CC – I look toward the third table and collect the card underneath it.
- CC – To the right of the third table, I find a wall along which helicopter spotlights move. The next card is underneath the table beside that wall.
- CC – I head to the back corner near the area where Ham is held. The card is on the floor beyond the ramp.
- CC – I head up toward Ham’s switch until I reach the section where I need to hang from window sills. The prison switch is on the left, but the card is on the right.
- CC – I enter the ground floor of the Slinky Dog switch area. As soon as I pass the spotlights, I collect the card from the shelf on my left.
- CC – I switch to Jessie and go over the red box, heading straight toward Rex. I move between the spotlights and jump up the darts. I wall-jump to the top, head right past the red switch, and collect the card from the small shelf.
- AM – I jump back to the previous shelf, turn left, and leap onto the overhead light to collect the item.
- SC – I double-jump straight ahead onto the next light and collect the card.
Level 7 – Junkyard / Trash Thrash
- AM – Right after saving the alien guys, I switch to Woody and break through the vent. I climb the ledge and use X to swing onto the handle and reach the collectible on the top ledge.This also unlocks the Memories achievement.
- CC – I continue through the level until Buzz throws a box down to Jessie. The first time I switch to Jessie, before breaking through the fan, I immediately turn 180 degrees and run left to collect the card.
- CC – I continue to the box Buzz dropped, jump onto it, and climb to the top of the high ledge to collect the card.
- SC – I double-jump underneath the ledge where Buzz is standing and turn left. I jump across the gap to collect the card.
- CC – Jessie jumps onto a valve to shut off the steam for Woody. I switch to Woody and shimmy across the yellow-and-black pipe. I jump past the electricity and climb four more pipes. I shimmy left and hit the red button, then head right and jump onto the air duct. The card is at the back.
- AL – As Jessie, I follow the path around and jump onto a button using X to release electricity upward. I switch to Buzz and head to that corridor, then wall-jump to the top. I grab a box, move right, and drop over the edge. I toss the box over the back edge and switch back to Jessie.If Jessie’s button has moved back to the left, I jump straight up and press X again to move it to the right. I then reach the box Buzz dropped, climb on top, and jump left to collect the Alien – Zurg figure.
- CC – After stopping the smashing obstacles, I switch to Woody and jump up to the right of the newly exposed duct. I collect the card there.
- CC – I cross the blue floor toward the screen and collect the card right at the edge in front of me.
- CC – I switch to Jessie and jump across the flaming pipes. I land on the valve, jump to the ledge, and collect the card.
- CC – I switch to Woody and swing across the handle to the next platform, where I collect the card.
- CC – After Buzz hits the red switch, I switch back to Woody and jump across the swinging platforms. I swing across the handle at the end and land on the other side to collect the card.
Level 8 – Haunted Bakery / Muffin to Fear
- SC – At the start of the level, I head down the road to the left and look for a scaffold-like structure in the distance. I jump onto the rock on the left, then onto the small ledge, and finally climb to the top to collect the card.This unlocks an achievement.
- CC – The wedding cake starts destroying the buildings. Facing the cake from the starting point, I head to the building closest to it on the left, the Tailor. I climb the charred remains and collect the card from the top floor.
- CC – I head to the second house on the left, the Newspaper building, and collect the card from the second floor of the burned-out building.
- CC – I cross the street to the right and head to the Saloon. I collect the card from the second floor of the burned-out building.
- CC – I head to the Jail, the first building on the right, and climb to the top after it has been reduced to rubble to collect the card.
- CC – I return to the starting point and face the cake. I turn 180 degrees and climb to the second floor of the burned-out building directly ahead, the General Store. I collect the card there.
- CC – I head to the destroyed building on the left, the Barbershop, and jump to collect the card.
- CC – I let the green bubbles destroy the last building on the right, the Bank. I collect the card from the top.
- AL – During the boss fight with the cake, I need to completely destroy every building to find the final alien. I can run around shooting the buildings, let the floating witches destroy them with their green bubbles, or blast them apart using the large space cannon.I make sure to destroy every side of every building along the two main streets. Once everything is destroyed, the final alien appears at the T-shaped intersection.Thanks to Crusty for figuring this one out. If I have followed the guide and collected everything else, I will also unlock The Collector achievement.