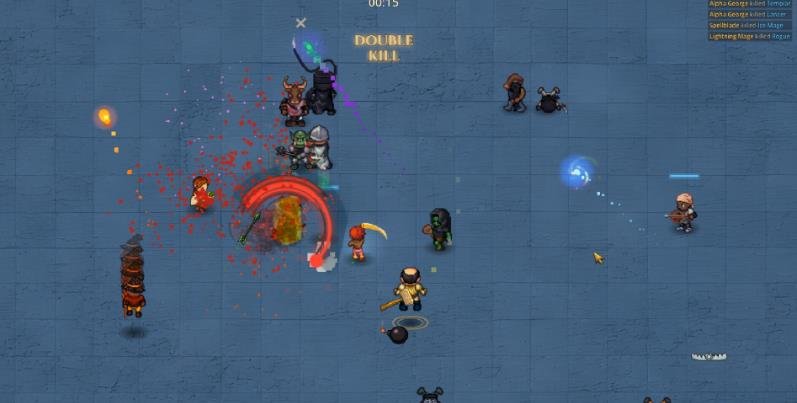
Most players will probably struggle during their first experience with the game, so I don’t recommend jumping straight into Hard Mode or expecting to beat everyone on the first try. If I actually do well on my first run, I simply ignore most of this because I clearly don’t need it.
How I start the Game
First Campaign
For my 1st campaign, I pick a starting lineup I want to try and just experiment. If I struggle, I don’t worry about it because I’ve already learned a lot, so I usually drop the campaign before Season 2.
Second Campaign
For my 2nd campaign, I pick a different starting lineup and build on what I learned from the previous run while trying something new. If it still feels rough, that’s fine too. I’ve gained more experience, tested my ideas from the previous run, and I drop it before Season 2 again.
Third Campaign
For my 3rd campaign, this is usually where I expect things to start clicking, so I pick the starting lineup I actually want to work with. If I’m not satisfied with the first season, I don’t mind restarting the 3rd or 4th campaign early either, I definitely won’t be the first person to do it.
I just don’t get annoyed at myself or the game. I enjoy the challenge because it makes the game much more satisfying once everything finally works.
The general idea is to learn the game, enjoy my time, and not be afraid of admitting defeat. The game is designed to be a challenge, and once I get comfortable with Normal difficulty, I usually start looking for more challenge on Hard pretty quickly.
How I Pick My Lineup
The game gives me a lot of tactical variety through different character personalities and traits, deep personal tactic customization, starting grids, and starting instructions. I have to try things out to see how they actually work in-game, but there are two important things I keep in mind.
There are a lot of strategies that work, but I still need to put the right people in the right roles. Or rather, I find a tactic that actually works with the fighters I have available.
Some of the more popular setups use a strong frontline with supports in the back:
- 2 Tanks, 2 Healers, 1 Ranged DPS
- 4 Melee, 1 Healer
- 3 Melee, 2 Supports
These are a safe bet early on because melee characters usually have an easier time at lower levels than ranged characters.
I generally divide the characters into 3 main groups with 3 subgroups each. Some characters, especially melee ones, fit into 2 subgroups depending on their skill choices, but the main theme of their kit usually tells me where they fit best.
Melee / Close Range
Tanks
Tanks are basically there to survive. They also act as half-time supports and are designed to peel for my backline. I rarely go wrong with CC, and they’re usually the main reason my team doesn’t melt within seconds.
Running 2 or 3 tanks is a safe bet, while 1 is riskier but still works with the right team composition. They’re also the only type I wouldn’t recommend dropping completely.
Assassins
Assassins are fragile but usually have good burst damage and high mobility. They’re designed to jump the backline and make the enemy formation crumble by forcing the frontline to peel for the backline.
I set them to flank and target basically anything that isn’t a tank. 1 works well, while 2 works if I want to finish fights within 10 seconds and see who melts first.
Roamers
If I want a Roamer to tank, I’m probably going to lose. They survive longer than Assassins, but their main job is roaming around the battlefield, causing chaos, and damaging whatever they reach.
I rarely go wrong with CC, but I still have to watch out for friendly fire. I pair them with designated tanks, and 1 or 2 works with 2 tanks, although they need to bring a lot of value because I don’t have many slots left.
Running 2 Roamers is probably my best bet if I want to get away with only 1 tank.
Ranged DPS
Shooters
Shooters mostly focus on shooting their opponents, with abilities that usually help them shoot better and more. They’re reportedly weaker than the other DPS options, but they usually fit 1 good CC.
I comfortably work with 1-2 of them.
Ability Casters
Ability Casters focus on big-impact abilities, so if I want ranged DPS, these are usually what I’m looking for. They become the top damage dealers if I keep them alive, and I usually get 1 AoE CC ability.
They normally have access to 1 defensive ability, which isn’t a bad choice. I still have to watch out for friendly fire, though. Running 1-2 is safe, while 3 might work with 2 tanks diving the enemy backline before they reach my casters, but that’s a very aggressive setup.
CC Casters
CC Casters are basically Ability Casters with more CC options but lower damage output. Their main purpose is getting strong AoE CC skills, and the more I have, the better.
They usually have access to 1 defensive ability. It’s still worth considering, although it’s worse than the defensive options available to DPS types, and I still have to watch out for friendly fire.
I usually add 1 at most. I can’t really think of a safe way to fit 2 unless I’m running just 1 tank up front and going extremely aggressive.
Supports
Healers
Healers are pretty straightforward. They heal and shield through everything, and if someone somehow dies, they revive them. I consider taking a defensive skill depending on my tactics, and if I get a chance to take a good CC, I take it.
I rarely go wrong with them. 1 or 2 is usually best, but as long as I outheal the opponent’s damage, I use however many I want. Yes, I also play without them.
Disruptors
Disruptors focus on messing with my opponent. If an enemy support is annoying me, this is the type I want. Their main focus is getting CC going in one way or another, but they also heal if I don’t want dedicated healers and they buff as well.
Their defensive skill is usually some form of CC, which makes it pretty much a must-have. I usually run 1 or 2 because I very much doubt 3 would win much when I’d probably need 2 tanks just to stop everyone from dying in 10 seconds.
Specials
Specials are the unique supports that don’t really fit into either of the other support groups. They get abilities that don’t clearly fall into CC or healing, although they usually still heal, CC, and sometimes buff.
They also have access to some form of defense that’s worth considering. I’d recommend using 1, maybe 2 if I really want to, but more than that is probably either suicide or completely gamebreaking, most likely the former.
How I Build My Club
There are a lot of things worth mentioning here and I definitely don’t know all of them, but I’ll focus on the things that helped me most during the early game.
- Assist Focus is the best targeting type I get.
- It might be placebo, but if I have a fighter I want to initiate fights, I set them to Initiator.
- It might also be placebo, but I set my tanks to Intercepting.
- I use personal tactics because they all matter, but I don’t overdo it. I only use the ones I actually need for my gameplan.
- I don’t get attached to my starting 3 fighters because they usually roll badly enough that 2 of them are gone before midseason anyway.
- On the first day, I buy 3-4 promising fighters instead of just 1.
- I build my tactic around the fighters I have instead of forcing a tactic onto fighters that can’t actually execute it.
- I use F1-F4 to influence the battlefield, especially in FFA Arena.
- I don’t stress too much over rare and legendary skills. They’re great, but fighters often bring more value by keeping 1-2 of the less common options.
- I don’t mind buying fighters that might fit my team just to see how they develop.
- Selling fighters that I know I won’t use is never a bad decision.
- Selling main roster fighters often hurts, though, because leveling up new ones isn’t exactly fast.
- Selling relics is a good source of big income early on, but keeping good relics is also completely fine.
- Winning fights is more important than getting a few extra levels in facilities.
- I attend the Tournament Center. 3v3 doesn’t give me much money, but it gives plenty of extra experience.
- I also use 1v1 to level up a specific fighter, and it sometimes earns more money than the entry fee.
- I enter the Iron Gate if I’m weak after a few weeks, beat the first 2 waves, and use the boost to get the run going.
- If I’m strong early, I either save my free entry for the end of the season to challenge Wave 5, or I attend early and pay for a second entry later. I usually lose to Wave 5 anyway, but it’s still worth it IMO.
- I put injured fighters into training, although it doesn’t really seem to make a difference…
- Time Chamber is stronger than Barracks, so I focus on leveling it first.
- Level 3 Barracks still matters because it gives me Intense Training.
- Injuries have to last at least 1 day, so once I get a longer injury, that’s when I upgrade the injury facility. It also affects injuries that have already happened.
- Buying champions from the market is rarely worth it. Random drops and private offerings should usually be enough.
- Even if I can’t buy certain fighters because of a season or renown lock, I still drop them.
- Low Injury Risk fighters seem to be pretty rare, so I really value good fighters with this trait.
- Level isn’t everything. A better strategy with decent fighters is usually better than buying a bad Level 30+ fighter from the market and trying to force them into my team.
- I don’t mind rerolling skills or stat rolls on level-up. It’s expensive, but a good roll wins me much more.
- I also don’t mind respeccing fighters, and I keep 1500 gold spare for a skill reroll to get 1 of 6 instead of 1 of 3 choices.
- When I build a fighter, I check their Codex to see what other skills they get.
- Champion’s Codex shows which skills are guaranteed. They can’t be rerolled, so sometimes I save 3500 gold by using a random respec instead of a specific one.
- FFA and Iron Gate rely more heavily on survivability, so if my main lineup is very aggressive, I might need to build a dedicated healer for these modes.
- When preparing substitute fighters for my main lineup, I don’t need a 1-to-1 replacement. There are usually multiple classes that fill the same role.
I’m sure there are plenty of other things worth adding and I probably forgot some of them, so I will keep updating the guide.