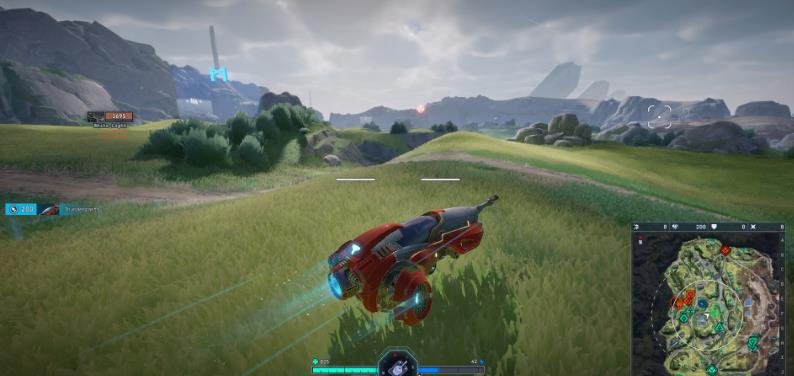
In this guide, I go through the tanks in Tyr, their playstyles, and what I can expect from each one. This should help me understand how each tank works, especially if I am new to tank games.
All Tanks, Classes, Builds and Strategies
Some useful things to know:
- All experience I earn is saved when I leave a game. If I die, I can leave and start another match unless I want to see the result or still have squad mates alive.
- Salutes give a small amount of silver. I can use them after matches, including from my match history.
- I unlock components from other tanks as I level them. To unlock all the gear, I need to get every tank to level 20. This also gives me a better idea of how the other tanks work.
- Every tank can perform well. The best tank is usually the one I enjoy playing the most.
Tank Playstyles
There are several different ways to play tanks in Tyr. I can look at them by Tank Class and Attack Strategy. Each tank also has a skill tree and component slots, which allow for different builds.
Tank Classes
Scout
A Scout’s main job is to spot enemies without getting spotted. These tanks have good concealment, high speed, and good maneuverability.
I move forward, find cover, and look for a bush with good sightlines. I stay close to the frontline because I am the team’s vision. I keep checking the mini map and make sure my team has good vision coverage.
Sometimes it is better to keep spotting instead of shooting and revealing my position. Scouts still have respectable firepower, so I use it when I can stay hidden. Repositioning, taking hidden shots, and using my speed make Scouts a high-risk, high-reward class.
Duelist
A Duelist is a Scout that focuses more on fighting. I still have good speed and maneuverability, but I expect to get spotted while looking for a 1v1 fight.
I use firepower, abilities, speed, and armor to defeat the other tank. I can start the match like a Scout, but the worse camouflage means I usually stay just behind the frontline.
When I find a target, I push in and fight. The most important thing is making sure more than one enemy cannot see and shoot me. If I can keep the fight to a 1v1, Duelists can be very dangerous.
Sniper
Snipers stay at range and use their strong firepower and penetration to support the team. I look for a good position with clear sightlines, such as a hill, and wait for targets.
I stay behind the frontline, but I still need to make sure I can see the fight. Sitting somewhere that cannot support my team does not help.
Snipers have excellent firepower and penetration, but they are not very fast and do not have much armor.
Flanker
Flankers are similar to Duelists but trade some 1v1 power for more health, armor, and mobility.
I look for a flank where I can use my firepower and then either push further or reposition. Duelists look for 1v1 fights, while Flankers look for good positions.
I can often deal high damage by attacking the side and rear armor of enemy tanks.
Anchor
Anchors are frontline tanks with above-average armor, high health, slower speed, and abilities that make themselves and nearby tanks harder to destroy.
I usually group up with other Anchors and Vanguards and push toward the enemy base. I need to pay attention to my armor angle and make sure I am in the right position.
I also need to watch the mini map. A strong frontline is not useful if I get stuck on a flank while Scouts capture my base.
Vanguard
Vanguards also have high health and strong armor, but they are more focused on breaking through enemy formations.
I look at the enemy deployment and search for opportunities to push through their line. Vanguards are still frontline tanks, but their abilities are designed to break stalemates and create breakthroughs.
Attack Strategies
Shoot and Scoot
I aim, fire, and move back while the cannon reloads. This is usually done from medium or long range.
A bush is an ideal position because the enemy may not be able to see me after I shoot. Tyr also has abilities that can help with this style, but the basic idea remains the same.
Brawling
Brawling is the opposite of Shoot and Scoot. I shoot, move toward the enemy, and keep fighting until one of us is destroyed.
To do this well, I need to understand where my armor is weak, how fast I can move, the enemy turret rotation speed, both health pools, and how much damage each tank can deal.
The best Brawlers can quickly judge whether they will win the engagement before committing.
Hit and Run
Hit and Run sits between Shoot and Scoot and Brawling. It usually involves getting closer to the enemy and dealing a large amount of burst damage.
This is less common in Tyr because the precision aiming system allows many tanks to use Shoot and Scoot instead.
It is most useful on tanks with high burst damage and long reloads, such as autoloaders.
Bounce
Bounce is similar to Shoot and Scoot, but I stay in position and rely on my armor instead of moving away.
This is normally used by heavy tanks. I use armor angling to stop enemy shots from penetrating.
I should spend some time in the armor viewer to check different angles against different cannon calibers. Some tanks have weak spots that are not obvious.
If I am unsure, pointing directly toward the enemy usually gives me the best armor profile.
I also use the “wiggle” by moving WASD slightly. This makes small weak spots harder to hit with precision shots.
For example, the Helios has excellent front armor, but the periscope on top of the turret is almost unarmored and can be shot from the front.
Builds
Specific builds are not listed for every tank, but some standout components and common build types are included.
Ability: Focuses on energy generation and ability cooldown.
Gun: Focuses on damage, accuracy, and reload speed.
Mobility: Focuses on tank speed and maneuverability.
Hybrid: A mix of the above.
Light Tanks
Light tanks are generally the fastest and least armored tanks in Tyr. They still have strong damage output despite their lower cannon penetration.
Their combination of speed, high DPS, and camouflage makes them dangerous when they get behind heavier tanks.
When playing a light tank, I prioritize enemy light tanks. The “scout war” often happens at the beginning of the match and can have a big effect on the game.
A team without light tanks is at a major disadvantage if the enemy still has one.
Alecto
Class: Duelist
Attack: Brawl
Build: Gun/Hybrid
Alecto is known for its incredible blink ability and very fast reload. Together, these make it extremely dangerous in 1v1 combat.
With the Weakness Analyzer, I can reduce the reload time to around 1 second when hitting a component or weak spot. This gives Alecto extremely high DPS.
The armor is not very strong, but the front armor is surprisingly good against High Explosive shells. Enemies will often target the easy-to-hit engine component, so I use Q and E to strafe while circling the enemy.
Alecto is very strong in a 1v1 but struggles when multiple enemies focus it. If I start a fight and become outnumbered, I can be destroyed quickly.
I usually deploy on a flank and let my team spot targets. Alecto is not suited for bush sniping. I watch the mini map and keep track of where the enemy team is.
The ideal engagement is attacking an isolated target from the flank. I hit the track module when it is blue, then circle the enemy while staying head-on and avoiding their cannon.
I prioritize enemy light tanks and snipers.
Ikarus
Class: Duelist
Attack: Hit and Run
Build: Gun/Hybrid
Ikarus is a flying tank and one of the most feared tanks in the game.
Its four-shot autocannon can deal a lot of damage at close range, but I need to manage the shots carefully. It can brawl light tanks, although its low health makes repeated trades dangerous.
The camouflage is decent while on the ground, but flying reduces it to 0 unless I use the stealth keystone talent. The armor is almost nonexistent, so speed and surprise are the main defenses.
Momentum Imparter is a standout component. It gives 30 damage per shot against tanks moving over 40 kph. This also applies while flying.
HE ammo is another option. It loses 5mm of penetration but gives 20% more damage.
I deploy like a Scout and use bushes when possible. When flying, I make sure the enemy team is distracted, I know where they are, and they do not have good shots on me.
While flying, I use WASD to constantly change direction and avoid fire, then use the mouse to aim my attack runs.
I level off near the end of the boost to get good speed for the glide. Launching from a high position also gives me more speed during a dive.
Top-down attacks can work because all tanks have thinner top armor. Otherwise, the 50mm penetration means I should focus on side armor and components.
I prioritize enemy light tanks and snipers.
Kestrel
Class: Scout
Attack: Shoot and Scoot
Build: Hybrid/Ability/Gun/Mobility
Kestrel is one of the standard Scout tanks and has a good mix of speed, firepower, abilities, and stats.
I can build it as a fast bush sniper, an energy-focused spotting tank, or something between the two.
The drone is its biggest strength. It spots enemies in range, and the +10% damage keystone also increases damage against enemies inside the spotting circle.
The Synchronizer is a strong component because it gives a 50% boost to energy generation from spotting assists.
Kestrel has a respectable cannon, decent speed, good camouflage for a Scout, and the second-best Scout armor after Alecto.
When surrounded and I have enough energy, I use the drone. Its large critical spot on the back disappears while it is flying.
I watch the other Scouts and my team during deployment, then move to a position that gives the team good vision.
An elevated bush around one-third to one-half of the distance between the bases is a good general position.
I watch for tracers, learn common bush sniper positions, and use the information from spotting to support the team.
I prioritize using the drone, enemy light tanks, and snipers.
Phantom
Class: Scout
Attack: Shoot and Scoot
Build: Mobility/Hybrid/Gun
Phantom is the stealth-focused Scout. It has excellent camouflage and an invisibility ability, but very little armor.
I can use its powerful cannon from a bush, or I can go invisible and move behind enemy lines to attack their rear.
Its cannon hits hard but reloads slowly, so it is difficult to destroy tanks alone. Drift Sparker is a standout component because it gives a useful speed boost.
I deploy as a Scout, preferably on a flank with plenty of bushes. I focus on spotting and taking shots when I have an opportunity.
The main strength of Phantom is spotting from unexpected positions and escaping when I get into trouble.
I prioritize component and critical shots and spotting.
Fuze
Class: Scout
Attack: Shoot and Scoot
Build: Ability/Gun/Hybrid
Fuze is one of the Alpha tanks. It has a decent cannon, excellent camouflage, and good speed.
HE can deal large amounts of damage when I hit a side module. Fuze is not naturally strong at brawling, but the glom missiles give it a chance in 1v1 fights.
The gloms also provide the only AoE damage in the game.
I fire gloms between cannon shots, starting after the first shot, to fill the downtime during the reload.
I can stick gloms to enemies, use other gloms to trigger them, or place them where I am going to shoot and create burst damage.
The missiles do not increase my spotting range like cannon shots, but enemy players can still follow the missile back to me.
I deploy like a Scout and prioritize enemy light tanks and snipers.
Seeker
Class: Scout
Attack: Shoot and Scoot
Build: Hybrid/Mobility/Gun
Seeker is the fastest tank in the game and also has an above-average cannon.
Its ability automatically searches for the nearest unspotted enemy within 400m. Instead of revealing the enemy, the bot gives a visual ping.
I can combine it with other tanks for strong spotting combinations. For example, using a Kestrel Drone on a Seeker Bot ping can almost guarantee a spot.
The main weakness is the tracks. Around one-third of the tank is tracks, so getting tracked can be a serious problem.
The raw DPS can help Seeker escape difficult fights against other light tanks, and its speed makes it difficult to catch when I have good situational awareness.
I deploy like a Scout and use forward bushes that are separated from other bushes. If something starts pushing toward me, I use my speed to reposition.
I prioritize enemy light tanks and snipers.
Medium Tanks
Medium tanks sit between the fast and lightly armored Light tanks and the slower, heavily armored Heavy tanks.
They have similar or lower DPS than Light tanks, but more penetration and armor that starts to matter.
Medium tanks can fill many roles, including sniping, flanking, and frontlining. I need to know which type of Medium I am using because different enemy classes require different responses.
Arbalest
Class: Sniper
Attack: Shoot and Scoot
Build: Gun/Hybrid
Arbalest and Ark are both Medium Snipers. Arbalest focuses on having the biggest gun.
It has the highest damage per shot, and its siege shot can knock out every module on a target with 130mm+ penetration.
This can disable the target, immobilize it, and prevent it from using abilities.
The downside is weak armor and camouflage. The front turret armor is acceptable, but the lower part of the tank is very weak.
I stay head-on in a bush and use Q and E while scooting. Showing the side exposes the engine compartment, which makes it harder to escape from counter-snipers.
I deploy behind my team, preferably in a bush, and shoot targets from range.
I prioritize enemies that threaten to break through the frontline.
Ark
Class: Sniper
Attack: Shoot and Scoot
Build: Gun/Hybrid
Ark is another Medium Sniper. It has a powerful cannon and a useful ability for escaping after being spotted.
I find a high position, preferably in a bush, and fire at targets before moving away for the next shot.
If I am spotted, I can use the ability to disappear from spotting, but I can still be seen again quickly at close range.
If there is no bush, I can make one, but I make sure I have a hill or other cover nearby.
Ark bushes are slightly different in color from normal bushes, so experienced players may know their locations.
The 80mm cannon can penetrate most tanks even from near head-on angles. Ark can often finish with some of the highest damage totals, but it has almost no armor.
There is also a component at the base of the barrel that can stop me from shooting if it is damaged.
I avoid close combat unless I have a major health advantage.
I prioritize enemies that threaten to break through the frontline.
Ranger
Class: Flanker
Attack: Brawl
Build: Hybrid/Mobility/Gun
Ranger is a Medium Flanker with a speed boost ramp ability.
It has good health, strong front armor, good speed, and a decent cannon. It is designed to bully Light tanks, Snipers, and exposed backline tanks.
I watch how my team deploys before choosing a flank. If other fast tanks such as Alecto or Tempest are going with me, I use the route to reach midfield quickly.
Once I reach midfield, I either keep pushing or double back and reposition depending on the fight.
When I see an enemy Light tank, I push in quickly and keep my front facing them. Against tanks like Kestrel, continuously ramming them can make it difficult for them to shoot back.
I avoid showing my side because the armor is weak there, and it is also an easy place to get tracked.
Ranger is very strong at helping win the scouting war against enemy Light tanks.
Rook
Class: Anchor
Attack: Bounce
Build: Hybrid/Ability/Gun
Rook is an Anchor tank designed to hold a position.
Its turret has strong armor, but the lower front is weak. I can protect this area by cresting a hill with only the turret exposed or by building a wall in front of the tank.
Once I am positioned correctly, the main weak spot is the small area around the base of the barrel. I move my aim point to make it harder for enemies to hit.
I prefer building walls on top of hills because the top armor is weak. The side and rear armor are also not very strong, so I avoid getting surrounded or flanked.
I deploy with the rest of my frontline. Once the enemy is found, I choose a position with good sightlines and some protection from flanks, then build walls.
I use Rook to force HP trades and lock down lanes. When I need to reposition, I still have enough speed to move.
Tempest
Class: Flanker
Attack: Shoot and Scoot / Hit and Run
Build: Gun/Hybrid/Mobility
Tempest uses a five-round autoloader and can deal high damage while the magazine is full.
The downside is the 20-second reload. If I get into trouble, I can dump the magazine and teleport away.
The main part of playing Tempest is managing this ability. Before teleporting, I check where my previous teleport circle is because that is where I will return after staying in the new circle for a moment.
Shell Charger is a useful component because the full stacks add more than 100 damage over the magazine.
Tempest has several exposed areas, so I avoid extended shooting fights. I also expect to get tracked often. If the purple tracks are hit, I become immobilized but do not take damage.
I can deploy as a bush sniper or as an aggressive Flanker. One option is to move up one flank, unload the magazine, teleport back, and then move up the opposite flank.
As long as the teleport circle is not destroyed, this lets me repeatedly move between the two flanks.
I prioritize component shots, Light tanks, and Snipers.
Valor
Class: Anchor
Attack: Bounce
Build: Ability/Hybrid/Mobility/Gun
Valor is the tank that can heal. It has a good mix of armor and mobility and can heal other tanks.
With the right skill tree and components, such as Power Converter, it can also heal itself.
I need to be careful with the ability because it is possible to accidentally heal an enemy.
The rounded armor makes Valor difficult to penetrate, even with high-caliber cannons. I use the wiggle to make it harder to hit.
When fighting with teammates, Valor is strong in attrition battles and can keep the frontline alive.
I deploy with Heavy tanks and stay near them. I also take pot shots when possible to generate energy.
I focus on healing my team and supporting the frontline.
I prioritize defending Heavy tanks.
Deadeye
Class: Vanguard
Attack: Hit and Run
Build: Gun/Hybrid/Ability
Deadeye is the only Alpha Medium tank and has an unusual design.
Its ability raises the turret a few meters. I need to use this carefully because it can make me an easy target.
I fire my shots quickly and press F again to cancel the ability as soon as possible.
The cannon is surprisingly strong, although firing two shots while hovering is less ideal.
The armor is similar to Ranger, but the center section can be penetrated by shots as low as 45mm HE.
Deadeye has good firepower but poor armor, without enough speed or camouflage to compensate.
I pair up with another frontline tank. My ideal position is behind a wall or hill where I can raise the turret, shoot while the enemy is distracted, then reposition and reload.
I prioritize tanks that can flank me and my team.
Heavy Tanks
Heavy tanks are the largest tanks in Tyr. They have the most health, armor, and mass.
They form the backbone of the frontline. Playing them well requires good armor positioning, map knowledge, and constant attention to the mini map.
Atlas
Class: Anchor
Attack: Bounce
Build: Hybrid/Gun
Atlas is the biggest and heaviest Heavy tank.
I can drive it down the middle and rely on its heavy armor, but this only works while enemies stay within a 45° cone in front of me. Once they reach my sides, the large side armor becomes a problem and I can also be tracked.
The 80mm cannon gives Atlas good firepower, but faster tanks can flank around and behind me.
The key to using Atlas is making sure I am in the right position for the team push. I choose paths that work with my team composition and use my health when necessary.
I also keep my armor angled. When used correctly, Atlas can control the flow of the game.
During deployment, I look at the other Heavy tanks and stay near them. I do not need to stack directly on top of them, but I do not want an unprotected flank.
I focus on engaging the enemy, keeping their attention, and pushing when an opportunity appears.
Tyr Tank Classes, Attacks & Builds
| Tank | Class | Attack | Build |
|---|---|---|---|
| Alecto | Duelist | Brawl | Gun / Hybrid |
| Ikarus | Duelist | Hit and Run | Gun / Hybrid |
| Kestrel | Scout | Shoot and Scoot | Hybrid / Ability / Gun / Mobility |
| Phantom | Scout | Shoot and Scoot | Mobility / Hybrid / Gun |
| Fuze | Scout | Shoot and Scoot | Ability / Gun / Hybrid |
| Seeker | Scout | Shoot and Scoot | Hybrid / Mobility / Gun |
| Arbalest | Sniper | Shoot and Scoot | Gun / Hybrid |
| Ark | Sniper | Shoot and Scoot | Gun / Hybrid |
| Ranger | Flanker | Brawl | Hybrid / Mobility / Gun |
| Rook | Anchor | Bounce | Hybrid / Ability / Gun |
| Tempest | Flanker | Shoot and Scoot / Hit and Run | Gun / Hybrid / Mobility |
| Valor | Anchor | Bounce | Ability / Hybrid / Mobility / Gun |
| Deadeye | Vanguard | Hit and Run | Gun / Hybrid / Ability |
| Atlas | Anchor | Bounce | Hybrid / Gun |
I hope you enjoy the guide.