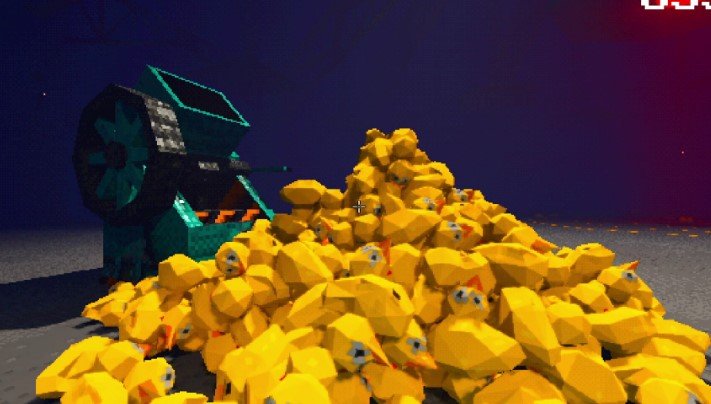
In this Project P.I.T.T. Achievement guide, I play as the intern, make products, feed The Maw, and turn that hole into a money-printing machine. There are 23 Steam achievements, one save, and nothing requires a second playthrough.
- Time: The story / phases are fairly short once I automate the factory. The long grinds are 15.000 fed, Combo x300, $1.000.000.000.000, and Consumerism.
- Missables: Gambling Crates are find achievements, so I hunt these before throwing every mystery box into The Maw. Everything else remains available on the same save.
- Online: I don’t need an internet connection. Steam Cloud is enabled, and the pause menu gives me Unstuck if I get stuck in the environment.
Project P.I.T.T. Secret Ending Guide
The Game
I start inside a brutalist facility built around a giant hole. That hole is The Maw, and almost anything I throw into it earns money. The faster I feed it, the more money I make. As I keep feeding The Maw, it grows and the facility changes through different phases.
The loop
- I make or buy products, starting with ducks and eventually moving into much stranger stuff.
- I move everything toward The Maw using my hands, broom, fans, magnets, pistons, launchers, golf club, and eventually the Automater.
- I keep my combo alive. The real money comes from chains of products rather than throwing in single ducks.
- I spend my money at the terminal to unlock new tools, machines, toys, products, and other upgrades.
- I keep feeding The Maw until the facility changes phases and introduces new products, debris, machines, and eventually assembly.
What actually pays
- Combo – I throw many products into The Maw during a short window. This is where MORE! / EXTRA! / MEGA! come from.
- Chain / Strike – I keep the bar alive. If I stop the dump for too long, I lose the chain.
- Better products – Later products are worth more than the early ducks. Pinata candy also gives me better returns than relying entirely on the starter products.
- Gambling crates – These give me bonus money and lucky / gold ducks. Their price keeps climbing, so I don’t rely on them as my main income late in the game.
Phases
Phase 1 is my intern floor. I start with the press, broom, fans, first Automater, and cash register.
As I progress, I unlock more products, toys, reality-bending tools, and machines. Later phases also introduce scripted debris that wrecks older factory layouts.
Once I reach the 200 kg pad, I treat it as a mid-game gate rather than the end. I keep buying upgrades and feeding The Maw.
Phase 3 isn’t about throwing more ducks into the percentage pipe. I need better upgrades, better products, and eventually assembled products to progress.
Controls and Tools
Default Controls
- WASD + mouse – I use these to move and look around.
- Space – jump.
- C – crouch.
- Shift – sprint.
- F – interact with presses, terminals, fuses, and machines.
- LMB – pick up / drop objects.
- RMB – throw objects after unlocking the throw upgrade.
- MMB – free rotate with the mouse axes.
- R – snap rotation.
- G – reset rotation.
- Scroll – adjust hold distance.
- Pause / Unstuck – my escape route if I clip into something or fall into a bad spot.
Official Notes That Matter
- I use the held-object jump as a form of flight. It is intended and especially useful for reaching catwalks and the scale.
- The 5-second height countdown / I SEE YOU comes from the cameras. I look at the ends of the support pillars for the lights that disable the height lock. I also throw products at cameras to smash them.
- Once I unlock sticky tools, panels stay where I put them. I stick panels to the floor or to another stuck piece to build permanent lanes.
- Dark outer rooms light up after I unlock their matching machines.
- If the game starts struggling, I turn off retro effects, set Details to LOW, and lower the resolution.
Tool Roles
- Workbench / Automater – I use these to spawn ducks. I point the output toward my production lane instead of directly at my feet.
- Broom – useful for early cleanup. It sweeps products but also creates clogs, so I don’t use it as my long-term factory solution.
- Fans – these become my main conveyor system. I point them toward The Maw. Later fans also help push phase debris into the hole.
- Magnets – I use these to grab large piles. Stacking magnets gives me huge lifts before I dump everything at once.
- Panels / pistons / launchers / bumpers – I use these for ramps, gates, launch pads, and general factory construction. Bumpers weigh around 5 kg, which makes them useful for the scale.
- Golf club – my early combo weapon. I use it to knock piles into The Maw. It pays well when I get the aim right.
- Remote – weighs around 1 kg. I use it on the scale and for remote dumps.
- Cash register – this unlocks KACHING!. Later, I build a short automated path into it. I avoid destroying the only register needed for a puzzle unless I have another one available.
- Pinata + bat – this unlocks FIESTA!. I smash the Pinata to produce candy, then send the candy into The Maw.
Early Game
- I make one duck and throw it into The Maw. This gives me QWACK!.
- I use the press until the first money unlocks appear. I don’t waste time searching for secrets yet.
- I buy throw, then broom or the first fan. Throwing everything by hand is useful for the tutorial, but I want a proper lane as soon as possible.
- I unlock the Cash Register. As soon as KACHING! appears, I buy it and either feed it or place it beside my dump lane.
- I turn on the Automater immediately. I point its output toward a fan or ramp leading into The Maw. I also stay out of the output shaft so my character doesn’t become part of the clog.
- I get my first combo with MORE! x100. I let the Automater build a pile, then use the broom, magnet, or golf club to dump everything together.
- I buy sticky tools after unlocking panels. My first proper factory looks like: Automater -> panels -> fan -> Maw.
- I spend instead of hoarding. Early upgrades increase my income far more than keeping a huge pile of unused cash.
Early Factory That Works
I use one Automater, a short panel funnel, and one fan pointing directly into The Maw.
I keep the broom around for spills, but the main lane handles the actual production.
Once I upgrade the spawn and stop products from leaking out of the funnel, I reach EXTRA! x200 without much trouble.
If Money Feels Slow
Usually, I am either feeding products one at a time, pointing the fan into a wall, or standing directly inside the output.
I fix the lane first.
Gambling crates give me extra money, but I don’t treat them as my main factory.
Builds
There isn’t a class system here. My build is my factory. I pick one main dump method and keep upgrading it.
Lane – Default 100%
I put the Automater or later product machines onto a stuck-panel chute, line up several fans, and send everything directly into The Maw.
I add pistons when products start getting stuck.
This setup is ideal for FAST! 400 / min and STUFFED! 15.000.
Magnet Dump – Combo
I let the Automater build a mountain of products, then grab the entire pile with stacked magnets.
I lift the pile and drop it into The Maw in one clean dump.
This is my preferred method for EXTRA! and MEGA!, especially when the pile gets large.
I make sure my character is nowhere near the shaft before dropping it.
Golf Pocket – Active
The golf club gives me good money during the early and middle game while my automated lane is still developing.
I club piles directly into The Maw.
Once my fans and Automater produce faster than I swing, I stop using the golf club as my primary money maker.
Pinata Smash
Once I unlock FIESTA!, I smash the Pinata with the bat and send the resulting candy / loot through the same production lane.
I don’t spend too much time comparing Pinata value against candy by eye. I just feed both into The Maw.
Register Line
I build a second short path into a cash register.
This is particularly useful when I need to use a register upstairs.
I use cushioned panels to stop products from bouncing away from the register.
Rules That Actually Matter
- I keep one main dump target. Two half-built lanes leak more products than they produce.
- I unlock sticky tools first and worry about pretty factory geometry later.
- Phase changes drop immovable debris onto old factory lines. When that happens, I rebuild instead of fighting the debris.
- Later fans help push phase debris into The Maw.
- I never leave a clog running while AFK. Ducks pile up, FPS drops, and my combo disappears.
- I use held-object flight whenever I need to service the catwalks or reach awkward areas.
Phases and Secrets
Phase Flow
- I feed The Maw and unlock the shop.
- I automate ducks.
- New products appear, so I change the input of my production lane.
- The catwalk / fuse / 200 kg pad becomes my mid-game gate.
- After reaching 200 kg, I keep upgrading instead of trying to force the percentage pipe with ducks.
- Later phases drop debris onto my factory, so I rebuild around the new tools and use the fancy fans to push wreckage into The Maw.
- Eventually I reach assembly. The pieces snap together, and those assembled products are what the upstairs pipes actually want.
Height, Cameras, Watcher
If I climb without preparing, I SEE YOU triggers and I get respawned.
I deal with this in two ways:
- I smash the cameras that I reach.
- I look at the lights on the ends of the support pillars and use them to disable the height countdown.
The observation window may also light up with someone watching me. That ties into the BAD? / INVISIBLE? achievements.
Upstairs Route – UP? and the 200 kg Pad
- I fly or climb using boxes to reach the catwalks.
- I find the torch and fuse box.
- I find 3 fuses and put all three into the fuse box. This is what unlocks UP?.
- A weighing pad appears with a 0 / 200 kg requirement. This measures kilograms, not the number of objects.
- I fill the pad with heavy objects. Gambling crates are around 10 kg when opened, bumpers around 5 kg, and remotes around 1 kg. I also use panel boxes filled with crates. Forty unopened crates also work if I have enough.
- A chute / grate / door appears with a number screen and percentage bar.
- Raw ducks stay at 0%, which is intended. I return later with better or assembled products, while continuing to upgrade the main factory.
- There is often a cash register beside the chute. I avoid destroying my only register if I still need it elsewhere.
Gambling Crate Hunt
Gambling crates appear around the facility, including the shop and tubes.
For GAMBLING!, I search the entire facility:
- Main floor
- Catwalks
- Dark rooms after unlocking their lights
- Delivery pipes
- Shop areas
- Upstairs
I avoid throwing mystery boxes into The Maw until the achievement pops.
If I am stuck at N-1, I walk the entire map again and check every pipe and dark room.
100 Percent Route
I work on the secrets while my factory is producing money. I don’t feed 15.000 products first and leave all the exploration until the end.
- QWACK! + first shop and KACHING!
I unlock the Cash Register as soon as it appears. - Lane online.
I set up the Automater and fan, then work toward MORE! x100. - EXTRA! x200.
I use the same lane with a larger spawn pile. - MESS! then LAG!
I deliberately leave 500, then 1.000 products on the floor. I clean everything afterward. - Explore.
I deal with the cameras / watcher, climb to the fuse box, and hunt the Gambling Crates. - 200 kg pad.
I fill the upstairs scale for HEAVY?, then interact with the resulting grate / door / chute for OPEN?. - Buy every new unlock.
I unlock FIESTA! and WEIRD!, then rebuild whenever phase debris destroys my factory. - MEGA! x300.
I use a magnet mountain or a late-game product dump. I also work toward FAST! 400 / min with a clean upgraded lane. - STUFFED! 15.000 fed.
I let the lane run while I stay out of the production path. - RICH! $1.000.000.000.000.
I use late-game products and combos. The target is one trillion, not one million. - CONSUMERISM!
I unlock and purchase everything. - LOOP? / SECRET? / END? / END!
I finish the upstairs pipe with the correct product, clean up the remaining secrets, trigger the first ending, then continue until I reach the second ending.
What Is Actually Rare
The achievements that take the most time for me are:
- Combo x300
- 400 products / min
- 15.000 products fed
- $1.000.000.000.000
- Buying everything
- The hidden upstairs route
- The two ending achievements
Everything else fits naturally into the same playthrough.