This guide contains all hidden tools, toys, and hidden objects I discover when playing the game. I explain all all items, their levels, and what each one does. Besides, there are Crates, UV Flashlight, Fuses, and other items. I start the game with a checklist of items I need for regular gameplay.
A Guide to Hidden Items, Tools, and Toys
Below, you find all tools with explanation and the properties of each toy. I also explain the multiple levels of tools and how secret progression reply on hidden objects.
Tools
Here I list the tools, their available levels, and what I use them for.
1. Box
Levels: 1–4
What it does: I use it as a container for putting items inside.
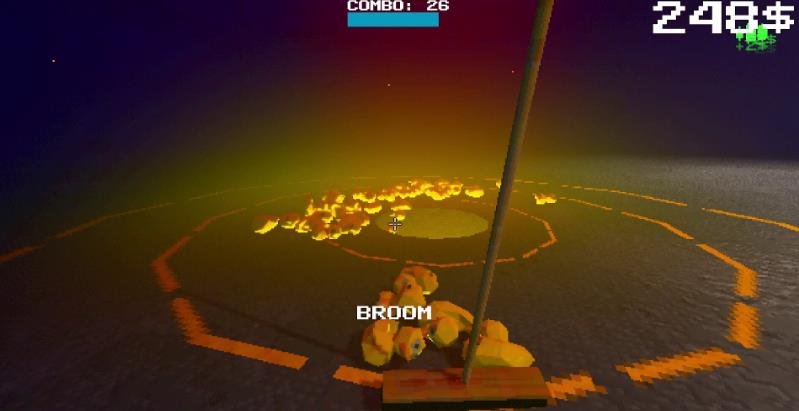
2. Broom
Levels: 1–3
What it does: I use it to sweep large quantities of products.
3. Sponge
Level: 1
What it does: I use it to wipe markings off walls for a very small amount of money.
4. Proxy Intern
Level: 1
What it does: It holds buttons on manual machines for me.
5. Shift Scheduler
Level: 1
What it does: It changes the rate at which things are produced.
6. Fan
Levels: 1–3
What it does: It blows products around.
7. Panel
Levels: 1–3
What it does: Square panels I use for building.
8. Cushion
Levels: 1–2
What it does: Soft square panels I use for building.
9. Slick
Levels: 1–2
What it does: Slick square panels I use for building.
10. Magnet
Levels: 1–2
What it does: Pulls things toward it within a certain radius.
11. Pickaxe
Level: 1
What it does: I use it to break Gambling Crates.
12. Press
Level: 1
What it does: Smashes products and deletes building items for a small return of their cost.
13. Trading
Level: 1
What it does: Similar to the Press, but I don’t have to put items in manually.
I click Roll to start the countdown, then click Stop as close to 0 as possible for the best chance of getting my money back.
0.001 = 9.99x = 99% of my money back.
14. Remote
Level: 1
What it does: Turns linked tools on and off.
Signal License
Levels: 1–3
What it does: Upgrades how many things I can link with the Remote.
15. Piston
Levels: 1–3
What it does: Moves objects.
16. Spring Pad
Levels: 1–2
What it does: Bounces objects.
17. Vacuum
Levels: 1–2
What it does: Sucks in products and spits them out wherever I choose.
18. Cannon
Levels: 1–2
What it does: Automatically loads products nearby and shoots them toward a targeted location.
I can activate it manually or link it to the Shift Scheduler.
19. Automated Bat
Level: 1
What it does: Detects products and hits them. It can also break Gambling Crates.
20. Tractor Beam
Level: 1
What it does: Similar to the Magnet, but it focuses on one location, has a longer reach, and doesn’t pull objects toward the center of gravity.
21. Gravity Inverter
Level: 1
What it does: Creates a dome that makes things float, including me.
22. Orbit Tool
Level: 1
What it does: I think of it like Saturn. When I turn it on, objects float and orbit around it. It doesn’t affect me.
23. Portals
Level: 1
What it does: Gives me two linked square portal panels. Anything that enters one portal comes out through the other.
Toys
Toys don’t have levels, so I just list what each one does.
1. Golf Club
What it does: I use it to play golf with ducks.
2. Bumper
What it does: Things bounce off it.
3. Productivity Display
What it does: Shows how productive I am.
4. Surveillance Camera
What it does: A placeable camera I can use to view an area remotely.
5. Security Monitor
What it does: Displays the feed from Surveillance Cameras.
6. Basketball Hoop
What it does: Lets me shoot products through it.
7. Gambling Crates
What they do: Gambling Crates contain different types of products depending on the crate.
- Wooden: Ducks
- Metal: Cash Registers
- Plush: Piñatas
- Anomaly: Anomalies
I can break Gambling Crates with the Pickaxe or Automated Bat.
8. Speed Radar
What it does: Measures how fast objects are moving.
9. Disco Ball
What it does: A decorative disco ball with a light effect.
10. Golden Duck Statue
What it does: A large golden duck statue.
11. Large Productivity Display
What it does: A bigger version of the Productivity Display.
12. Large Security Monitor
What it does: A bigger version of the Security Monitor.
Hidden Items
This section covers the hidden items and secret progression. These are the items I need for the hidden route.
1. Fuses
I use them in the Fuse Box to progress through the hidden/secret route.
There are 3 Fuses hidden around the main area. I can find them up high on:
- Metal beams
- Catwalks
- Lights
Once I find all three, I put them into the Fuse Box to continue the hidden progression.
2. UV Flashlight
Reveals hidden markings, numbers, and interactions that I normally can’t see.
The UV Flashlight is important for the secret route and helps me find the clues needed for later puzzles.
3. Access Card
I use it to unlock the elevator keypad during the Secret Ending route.
I create the Access Card by putting a Pickaxe into the Anomaly Crafter after discovering the interaction with the UV Flashlight.
Once I have the Access Card, I use it on the elevator keypad. I can then use the hidden UV clues to figure out the code needed to continue.
Quick Reference
In this guide, I use tables below for a quick reference for Toys, Tools, and hidden Items.
Tools
| Item | Level | What It Does |
|---|---|---|
| Box | 1–4 | Holds items. |
| Broom | 1–3 | Sweeps large quantities of products. |
| Sponge | 1 | Wipes markings off walls for a small amount of money. |
| Proxy Intern | 1 | Holds buttons on manual machines for me. |
| Shift Scheduler | 1 | Changes the production rate. |
| Fan | 1–3 | Blows products. |
| Panel | 1–3 | Square building panels. |
| Cushion | 1–2 | Soft square building panels. |
| Slick | 1–2 | Slick square building panels. |
| Magnet | 1–2 | Pulls things in within a radius. |
| Pickaxe | 1 | Breaks Gambling Crates. |
| Press | 1 | Smashes products and deletes building items for a small return. |
| Trading | 1 | Trades unwanted items for a chance to recover money. |
| Remote | 1 | Turns linked tools on/off. |
| Signal License | 1–3 | Increases how many things can be linked with the Remote. |
| Piston | 1–3 | Moves objects. |
| Spring Pad | 1–2 | Bounces objects. |
| Vacuum | 1–2 | Sucks in products and spits them out where I choose. |
| Cannon | 1–2 | Auto-loads nearby products and shoots them at a target. |
| Automated Bat | 1 | Detects and hits products or breaks Gambling Crates. |
| Tractor Beam | 1 | Focused long-range pull toward a selected location. |
| Gravity Inverter | 1 | Makes objects and me float inside its dome. |
| Orbit Tool | 1 | Makes objects float and orbit around it. |
| Portals | 1 | Two linked portals that transport objects between them. |
Toys
| Item | What It Does |
|---|---|
| Golf Club | Lets me play golf with ducks. |
| Bumper | Things bounce off it. |
| Productivity Display | Displays how productive I am. |
| Surveillance Camera | Lets me view an area remotely. |
| Security Monitor | Displays Surveillance Camera feeds. |
| Basketball Hoop | Lets me shoot products through it. |
| Wooden Gambling Crate | Contains Ducks. |
| Metal Gambling Crate | Contains Cash Registers. |
| Plush Gambling Crate | Contains Piñatas. |
| Anomaly Gambling Crate | Contains Anomalies. |
| Speed Radar | Measures the speed of objects. |
| Disco Ball | Decorative disco ball with a light effect. |
| Golden Duck Statue | Large golden duck statue. |
| Large Productivity Display | Larger Productivity Display. |
| Large Security Monitor | Larger Security Monitor. |
Hidden Items
| Item | What It Does |
|---|---|
| Fuses | 3 are hidden in the main area and are used in the Fuse Box for secret progression. |
| UV Flashlight | It reveals hidden markings, numbers, and interactions. |
| Access Card | Unlocks the elevator keypad during the Secret Ending route. |